Highlighting Text With PyMuPDF
Harald Lieder·October 30, 2023
PyMuPDF is a Python library that provides a wide range of features for working with document files. Among the most useful features of PyMuPDF is its ability to highlight text in PDF documents.
This article continues Advanced Text Manipulation Using PyMuPDF and Explore Text Searching With PyMuPDF.
“Highlighting” refers to visually marking selected text in order to attract the reader’s attention. Typical uses include documenting proposed changes to documents during contract negotiation processes.
PyMuPDF lets you highlight, underline or strike-out single words or text spanning multiple lines using a desired color. Text may be written horizontally or be rotated by an arbitrary angle.
Getting Started
To mark text on a PDF page, you need to know its position. Therefore, you usually will first search for it to retrieve its coordinates.
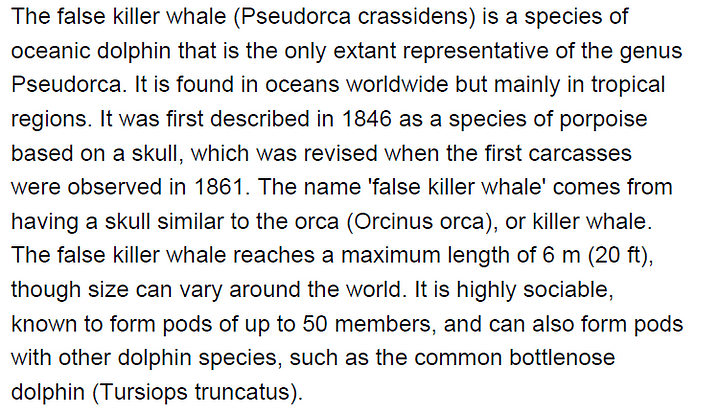
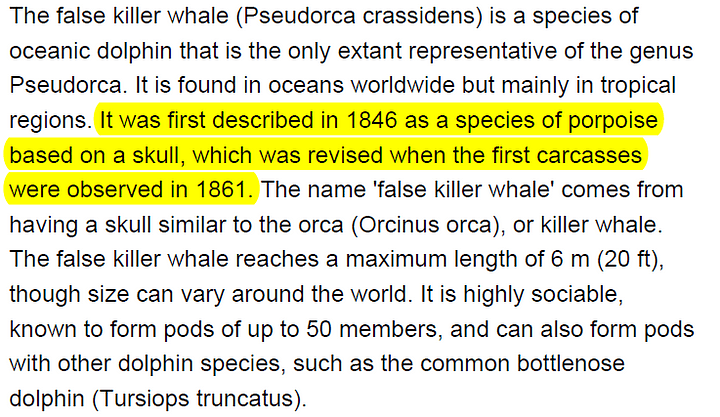
Let’s look at an example. Suppose on the following page we want to highlight all occurrences of the word “whale”:
For this, we can use the following simple script:
import pymupdf  # import package PyMuPDF


# open input PDF
doc=pymupdf.open("input.pdf")


# load desired page (0-based page number)
page = doc[pno]


# search for "whale", results in a list of rectangles
rects = page.search_for("whale")


# mark all occurrences in one go
page.add_highlight_annot(rects)


# save the document with these changes
doc.save("output.pdf")This is the result:
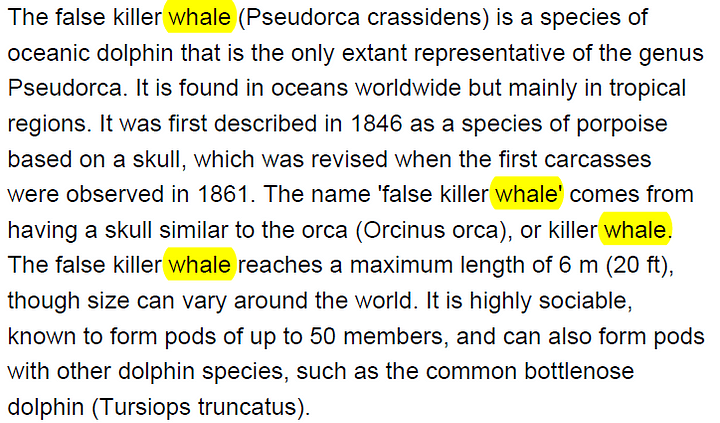
Our code has created one annotation object automatically, that covers all four occurrences of the word: The method add_highlight_annot has in-built intelligence that determines that multiple locations have been provided and takes appropriate action.
You can of course iterate over the rectangles and choose an individual treatment, for instance a different color for each match. The following snippet shows the lines that require changes:
# define two colors to choose from
colors = (pymupdf.pdfcolor["pink"], pymupdf.pdfcolor["green"])


# give each occurrence a different color
for i, rect in enumerate(rects):
    color = colors[i % 2]  # select the color for this occurrence
    annot = page.add_highlight_annot(rect)  # highlight it
    annot.set_colors(stroke=color)  # change default color
annot.update() # update annotationHere is the result: Even and odd text matches have been colored differently.
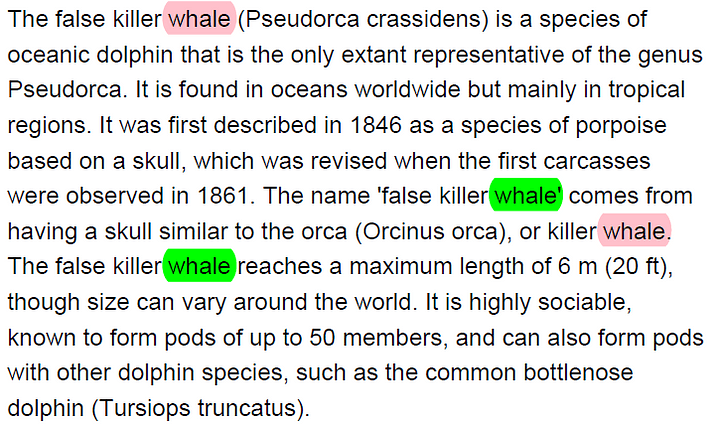
This time we have created four annotation objects — one for each matching rectangle — allowing us to set individual properties.
Multi-Line Highlighting
Probably everyone has done that once: Read a book and use a marker pen to physically highlight longer pieces of text or even lines.
PyMuPDF supports this with the same above method add_highlight_annot. All we have to do is use a different call pattern.
We can specify the point where the “text-marker pen“ should start, and also the point where we wish to stop highlighting, page.add_highlight_annot(start=p1, stop=p2).
The two parameters, “start” and “stop” are PyMuPDF Point objects.
The method in this case identifies relevant text lines, determines the start point within the first line and the end point inside the last line.
Let’s show how this works in our example page.
- Suppose we want to mark this sentence in our example page: “It was first described in 1846 as a species of porpoise based on a skull, which was revised when the first carcasses were observed in 1861.”
- As before, we need to search for the text. But from the returned list of rectangles we take the top-left point of the first rectangle as “start”, and the bottom-right point of the last rectangle as “stop”.
Let us make the appropriate changes to our code and see how it works.
# search for this sentence
needle = """It was first described in 1846 as a species of porpoise based on a skull, which was revised when the first carcasses were observed in 1861."""
rects = page.search_for(needle)  # returns a list of rectangles


p1 = rects[0].tl  # top-left point of first rectangle
p2 = rects[-1].br  # bottom-right point of last rectangle


# mark text that potentially extends across multiple lines
page.add_highlight_annot(start=p1, stop=p2)Result:
Success! As a side note:
Consider this marking approach as a convenience only. It is especially useful if you only know the first and last words of the text, or if you don’t want to search for an overly long sentence.
This method will not work correctly with non-horizontal text.
However, if the coordinates of the full sentence are indeed known, the same result can be achieved if we simply iterate over the matching rectangles and highlight each one with its own annotation. This will also work for non-horizontal text — see the next section.
Highlighting Non-Horizontal Text
Some pages contain non-horizontal text. This regularly happens when the page itself is rotated as a whole.
But it is also possible that an unrotated page contains a mixture of horizontal text, text rotated by 90 degrees, or even diagonal text.
Note
For highlighting text correctly, it is however important to know the text orientation. In our previous examples, if you look closely you will notice that the highlighted areas are not just simple rectangles — instead the algorithm has determined what are the left and right sides of the area and has drawn curves there, no straight lines. Similarly for underlining: the algorithm needs to know where to assume the bottom of the text.
For non-horizontal text, it therefore is not sufficient to simply provide rectangles to add_highlight_annot (or add_underline_annot etc.): we must use so-called quadrilaterals (or “quads”, “tetragons”) instead. To learn more about quadrilaterals, please consult the documentation. For a quick overview, simply look at the following image. If your needle was “PyMuPDF” and quads=False (the default), then the blue rectangle is returned. For quads=True, the white figure is returned, which closely wraps the text.
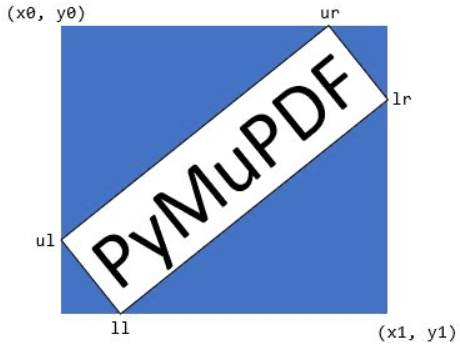
So, PyMuPDF’s search_for method makes this as simple as child’s play: Just use page.search_for(needle, quads=True). This returns a list of quadrilaterals (“quads”), which can be used in highlighting annotations in exactly the same way as rectangles.
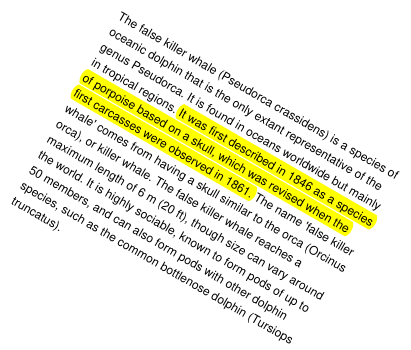
The following script correctly marks multiple lines, even when they are not written horizontally:
# search for this, potentially non-horizontal sentence
needle = """It was first described in 1846 as a species of porpoise based on a skull, which was revised when the first carcasses were observed in 1861."""
quads = page.search_for(needle, quads=True)


for quad in quads:
page.add_highlight_annot(quad)Here is the proof:
Beyond Highlighting
In this article we talked about “highlighting” and occasionally “text marking”. For the sake of completeness, we mention that the following variants can be used in exactly the same way as add_highlight_annot:
add_underline_annot: underlines selected text (with a straight line)add_squiggly_annot: underlines selected text (with a zigzagged line)add_strikeout_annot: strikes through selected text
Conclusion
PyMuPDF provides sophisticated ways to mark text on PDF pages.
Text marking is closely integrated with text searching capabilities. It supports multiple types of marking like highlighting or underlining, free choice of colors and arbitrary text orientation.
Have a look at related articles on our blog. Other resources are our excellent documentation, the #pymupdf channel on Discord and the interactive, installation-free playground pymupdf.io.
Discuss This Article with the Community
Have a question, a different approach, or something you built after reading this? Share it on the forum or join the Discord, we'd love to hear from you.