Translating PDFs: A Practical PyMuPDF Guide
Harald Lieder·July 5, 2024
Introduction
This tutorial will teach you how to translate a PDF written in English to another language (Korean) using PyMuPDF.
We will start with ensuring that you have a Python programming environment containing all required components.
We are providing the required Python source and an example PDF. When you execute the program it will create a new PDF where the original English text has been replaced by Korean text.
As a special feature, the English original is still available in the new PDF. Using your PDF viewer, you will be able to switch back and forth between Korean and English at any time.
How the Program Works
The Python program uses the Python package deep-translator for the translation, and from the many alternatives offered, it selects the Google cloud service GoogleTranslator.
Like with any Internet cloud service, the program needs a working internet connection to do its work.
The actual logic reads text paragraphs from each page of the English input document, sends the text to the translator, receives the Korean translation and stores that text in the original paragraph’s location.
Preparatory Work
Before we actually start coding, we need to make sure that all required Python packages are installed.
Open a terminal window on your computer. Enter commands in that window as we proceed:
Make sure your Python version is high enough. Execute:
python -VOn some machines, like Linux or Mac OSX, you might have to write python3 instead of python. Please always assume python or python3 in all what follows – as is required on your machine.
The response is something like Python 3.12.3. We need at least Python 3.9.0. If you have Python 3.8.x or less, then you must upgrade your Python first.
How this works is dependent on your Operating System, so please investigate the details in this unfortunate case.
Assuming from here on that your Python version indeed is compliant. The next thing to confirm is that your Python contains the standard installation program “pip”. This will be needed to install the above mentioned translator package and PyMuPDF.
Check if the following command in the terminal window works:
python3 -m pip –versionIf an error occurs saying that pip is not installed, you must install it before we can continue. This will never happen if you are working on a MS Windows machine. On Linux and Mac OSX machines execute the following:
Linux (Ubuntu example):
sudo apt update
sudo apt install python3-pipMac OSX:
python3 -m ensurepip --upgradeNow we are all set to do our required installations.
Enter the following commands in the terminal window. The first line will make sure that the Python installation program pip is on current level.
Line 2 and 3 will install the translator and PyMuPDF.
python3 -m pip install --upgrade pip
python3 -m pip install deep-translator
python3 -m pip install pymupdfDownloading and Executing the Program
Please download the following files into some folder of your choice
- translator.py our program
- orca-english.pdf our example PDF in English
Open a terminal window there and execute the following command (again, remember to potentially use python3 instead if required):
python translator.py orca-english.pdfAfter a few seconds you should see a new file appearing, called orca-korean.pdf. This is the result!
Inspecting the Code
The following code did our job. Our example PDF is (part of) a Wikipedia article about the dolphin species “Orca”.
1 import pymupdf
2 from deep_translator import GoogleTranslator
3
4 # Define color "white"
5 WHITE = pymupdf.pdfcolor["white"]
6
7 # This flag ensures that text will be dehyphenated after extraction.
8 textflags = pymupdf.TEXT_DEHYPHENATE
9
10 # Configure the desired translator
11 to_korean = GoogleTranslator(source="en", target="ko")
12
13 # Open the document
14 doc = pymupdf.open("orca-english.pdf")
15
16 # Define an Optional Content layer in the document named "Korean".
17 # Activate it by default.
18 ocg_xref = doc.add_ocg("Korean", on=True)
19
20 # Iterate over all pages
21 for page in doc:
22     # Extract text grouped like lines in a paragraph.
23     blocks = page.get_text("blocks", flags=textflags)
24
25     # Every block of text is contained in a rectangle ("bbox")
26     for block in blocks:
27         bbox = block[:4]  # area containing the text
28         english = block[4]  # the text of this block
29
30         # Invoke the actual translation to deliver us a Korean string
31         korean = to_korean.translate(english)
32
33         # Cover the English text with a white rectangle.
34         page.draw_rect(bbox, color=None, fill=WHITE, oc=ocg_xref)
35
36         # Write the Korean text into the rectangle
37         page.insert_htmlbox(bbox, korean, oc=ocg_xref)
38
39 doc.save("orca-korean.pdf")Please find comments by code line number below:
- In lines 1 to 9 we import the required packages (PyMuPDF and deep-translator) and define some constants for later use.
- Line 11 configures the translator so it will provide us with the Korean version for any given English text.
- Line 14 opens the input PDF.
- Line 18 defines an Optional Content layer with the name “Korean”. Whenever we overlay English text later on, we will be referring to this layer.
- Lines 23 and subsequent ones perform the actual text replacement:
- Extract text in paragraph chunks, making sure that any hyphenation is detected and resolved. For each text block, the (English) text itself and the rectangular area (“bbox”) covered by it are identified.
- Line 31 invokes the translator, which delivers us a Korean string.
- Line 34 covers the English text area with a white, borderless rectangle, which we make dependent on whether the “Korean” layer is currently active.
- Line 37 writes the Korean text in the same rectangle – again referencing the “Korean” layer name. The powerful PyMuPDF method insert_htmlbox takes care of a lot of things here:
- Select all suitable text fonts (for Korean and for any text particles that have not been translated).
- Automatically shrink (downsize) the text if it wouldn’t fit.
- Accept and honor any HTML and CSS syntax particles that an advanced user may want to include in the “korean” string before writing it. This might include choosing some own font instead of the one selected by MuPDF, or inserting additional line breaks and so on.
- Line 39: Save the translated document under some new name.
Here is the result for our example document:
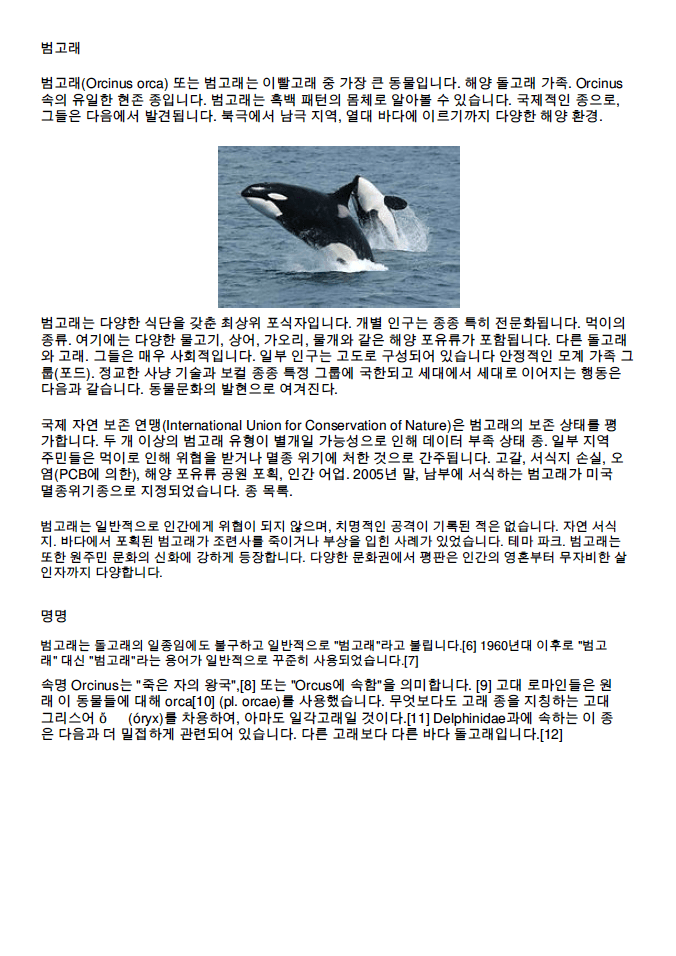
As can be seen, the original layout has largely been maintained: the text rectangles are the same, the image is still visible.
The selected translation engine (GoogleTranslator) has also determined not to translate certain text particles (e.g. when they represent names) – which resulted in a Korean / English text mixture in some places.
As mentioned in the introduction, our resulting PDF is actually a copy of the original with an additional Korean layer:
Using a suitable PDF viewer (Adobe Acrobat, Foxit, evince), we can deactivate that layer and will then see the original appearance without change. When clicking on the eye symbol below (Linux evince), the Korean text will disappear and English will be shown again.
Adjustments and Optimizations
The above code is simple and straightforward, and you will immediately get results you can work with. But there also is optimization potential and you can take influence or extend the results.
Here are some hints and tips. Most certainly, you will want to follow the recommendation on reducing the resulting file size.
File Size Reduction
Our example code does not care about the resulting output file size. Because of MuPDF’s automatic font detection, multiple fonts are automatically embedded in their full original size. This easily can lead to a large, multi-megabyte file – especially when large Asian fonts come into play, like Korean here.
One of the many PyMuPDF features easily addresses this: Just replace line 39 above by the following two:
doc.subset_fonts()
doc.ez_save("orca-korean.pdf")This will shrink every font by removing all of its unused characters. Then, the resulting document is saved using all available compression options.
The two lines above will lead to a file size of 170 kilobytes (instead of 35 megabytes if doing nothing).
Modifying Translated Text
Our used text output method, insert_htmlbox is capable of understanding HTML / CSS syntax.
It actually even assumes that HTML text is presented to it and will therefore ignore conventional line breaks (“\n“) and multiple spaces (both are replaced by one normal space). If the translator generates these and you want to keep them, you should edit the “korean” string accordingly before writing it. For example, replace any conventional line breaks by the HTML equivalent “<br>”:
page.insert_htmlbox(bbox, korean, css=“* {font-family: sans-serif}“, oc=ocg_xref)Conclusion
Using PyMuPDF and an appropriate translation service, automatic document translation becomes an easy task.
You can convert existing books, manuals or user guides to multi-language versions, where you can switch between different languages with just a mouse click in your PDF viewer.
Related links:
PyMuPDF.io — includes an installation-free PyMuPDF environment and an AI-supported answering machine about its features.
PyMuPDF Documentation — the full documentation with all the details and many examples for beginners.
MuPDF.NET — the .Net port of PyMuPDF for programming languages like C#, F#, VisualBasic.Net and more.
Discuss This Article with the Community
Have a question, a different approach, or something you built after reading this? Share it on the forum or join the Discord, we'd love to hear from you.